Dashboards and client sites
Build a dashboard and publish it as a client site
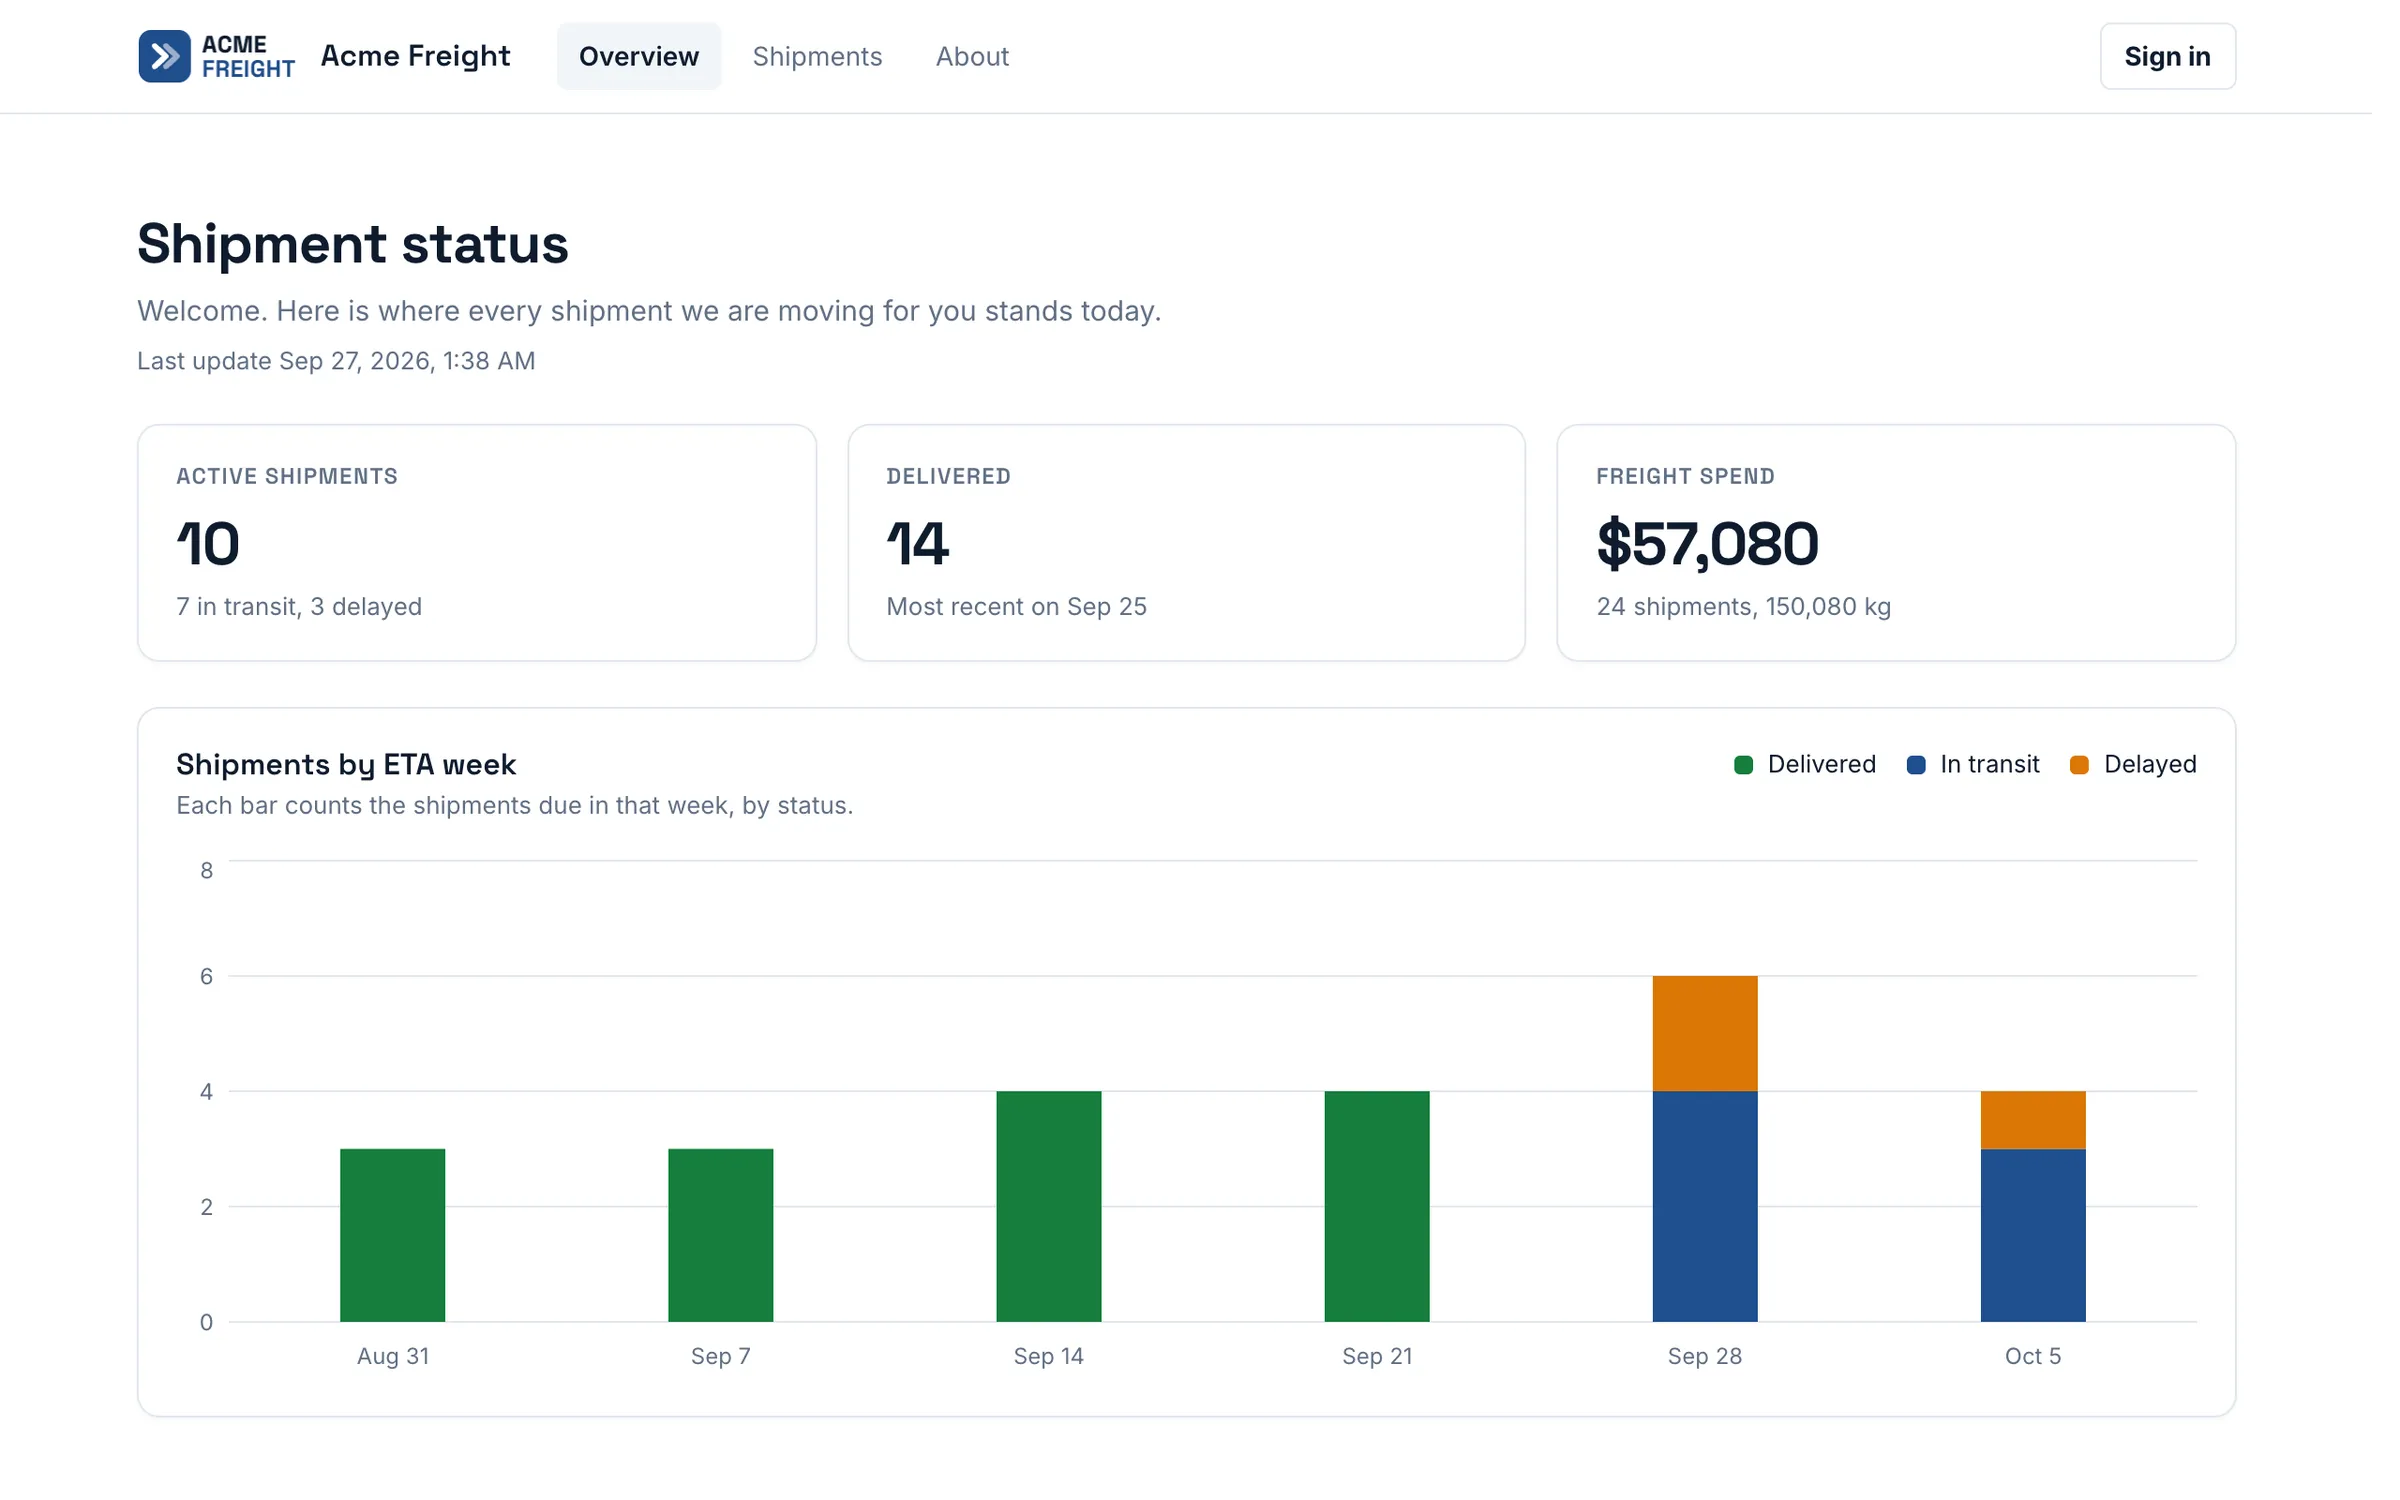
Describe a dashboard in a chat. It shows the rows and runs of your automations as pages, charts and tables, and it can start a run once a person confirms. Your team uses it inside Autoworklet. When it is ready, publish it as a site for your clients, with your logo, your colors and its own sign-in page.
For organization admins and managers. Publishing a site needs a Pro or Enterprise plan.
1. What you get
A dashboard is a set of pages that a chat writes for you. It reads the rows and runs of the automations you choose, and it can ask to start new runs. It runs in a sealed frame, so it can only reach what you bind to it.
- A dashboard for your team
- Every member of your organization can open every dashboard in the app. Only admins and managers can create, change or publish one.
- A site for your clients
- Publish a dashboard and it gets its own address, such as
dashboards.autoworklet.com/acme. The site has its own sign-in, invite and password reset pages, with your logo, title and colors. In the app, a client you invite is a viewer, who reads the site, or an operator, who can also start runs. - Live data
- The dashboard fetches new rows every 5 seconds while a run of a bound automation is active, and every 30 seconds otherwise.
- Where to find it
- In the app, open Menu, open the Dashboards group, and click Dashboards. The menu shows it once your organization has at least one automation.
2. Create a dashboard
On the Dashboards page, click New dashboard and pick one of two starts. An organization with no automations sees Teach an automation first instead.
Start from a recommendation
- Click Recommended. Autoworklet reads the newest 100 rows of each grid and the recent runs. The screen shows Reading your grids and runs while it works.
- On Recommended for your data, untick the items you do not want. Each item is marked Action or Display.
- If you like, type one more instruction under Add a line of your own, for example "group everything by week".
- Click Create. The editor opens, and the chat sends the first request by itself: a landing page, then a page for each item you kept.
Start blank
- Click Blank and type a Name.
- Under Automations the dashboard may use, tick the automations it may read and run. All of them start ticked.
- Click Create, then describe the dashboard in the chat.
Then, in the chat
- Describe it in plain words
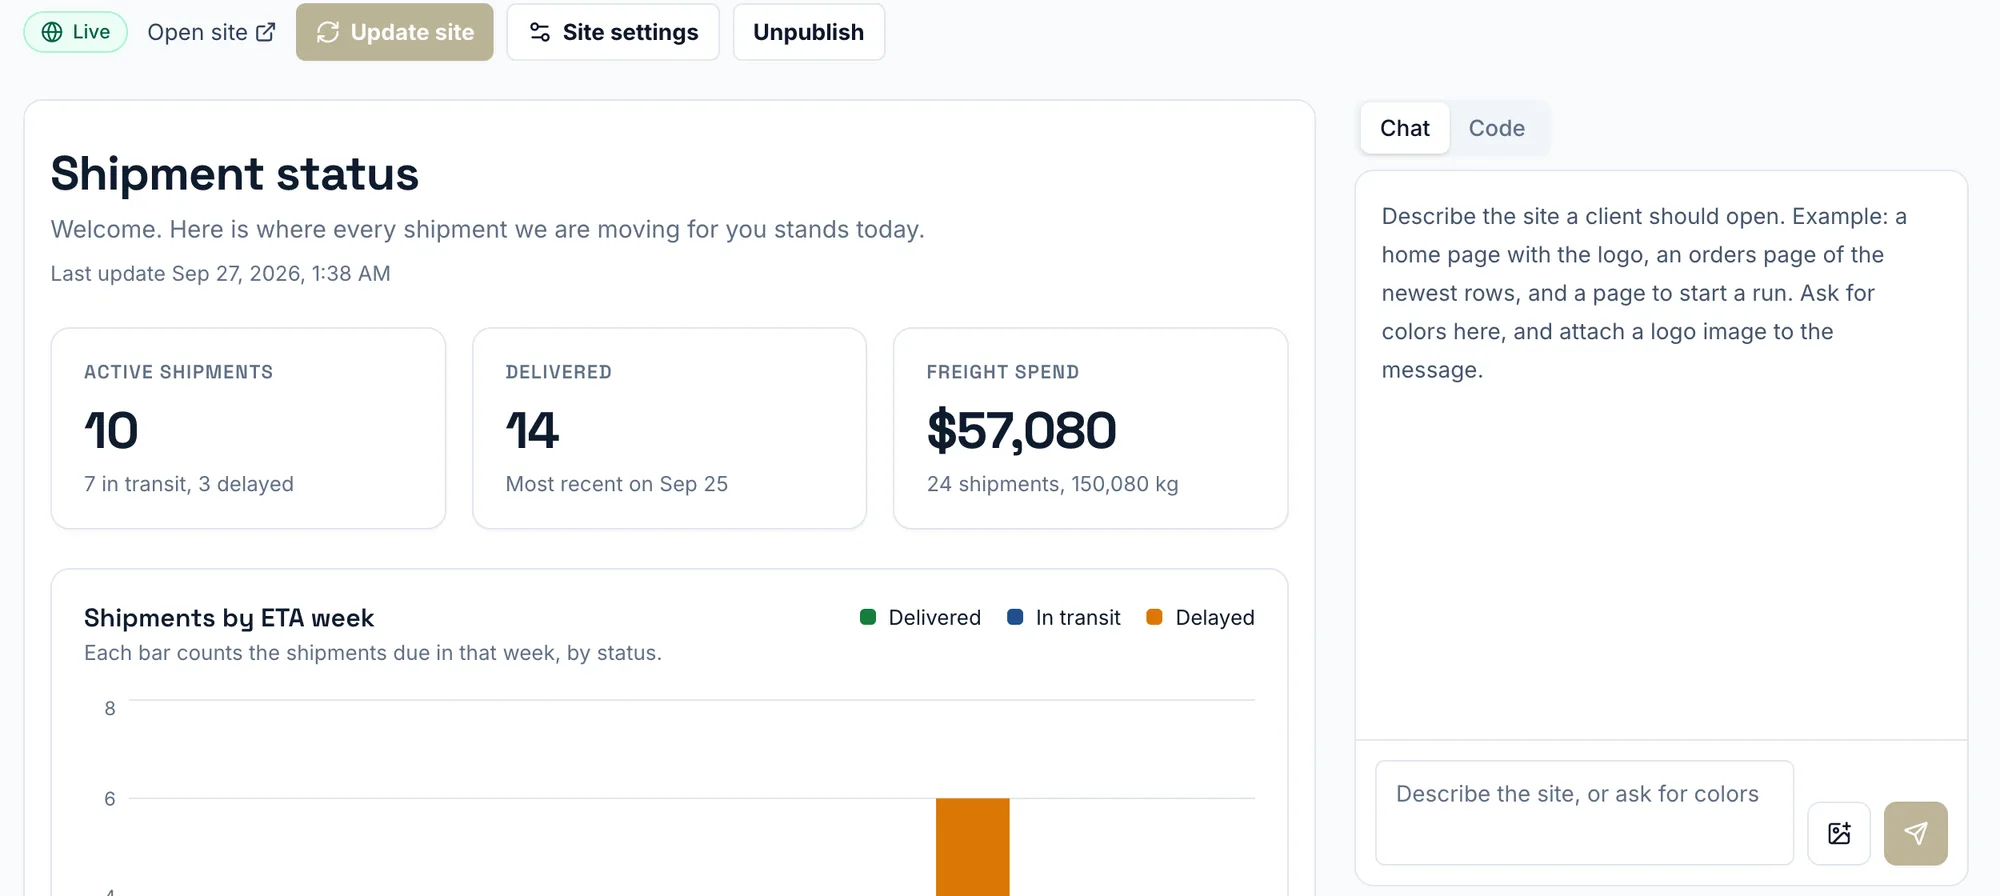
- Type in the box that says Describe the site, or ask for colors and press Enter. For example: "A home page with our logo, an orders page with the newest rows, and a page to start a run." Each later message changes what is already there.
- Point at what to change
- Click the pointer button next to the send button, then click a part of the preview, or drag a box around an area. Each part gets a numbered pin, and a chip above the message box. Use the numbers in the message, for example "make 1 bigger and put 2 above it", and press Enter. The chat is told where each pin is in the code, and which of your components draws it. Click Done or press Esc to use the preview again. On a phone, tap the part, and the chat opens again with the pin.
- Adjust a pin
- A chip has up to three buttons. The code button opens the line the pin came from in the Code tab; a version saved before pins had lines has none. The arrows button moves the pin to the part around it, for example from a heading to its card, until the pin covers the whole page. The cross removes the pin.
- Every reply is a preview first
- The reply appears in the preview with the bar The preview shows an unsaved change. Keep it? Click Accept to save it as a new revision, or Discard to drop it. Nothing is saved until you accept.
- Fix it
- If a reply does not compile, or crashes while it draws, the chat shows Fix it. Click it to send the error and the failing files back to the chat.
- Accepting changes the draft only
- Clients keep seeing the version you published until you click Update site, as described under Publish as a site.
Good to know
- If you leave a Recommended start before it finishes, the list shows that dashboard as No content yet, open to continue or delete.
- The chat can send up to 200 KB of the current code to the model. Edit a larger dashboard in the Code tab or with a coding agent.
3. Choose what it can use
The Bindings panel in the editor is the whole reach of a dashboard. The server refuses anything that is not bound, so this panel tells you exactly what a dashboard can touch.
- Automations
- Click Add automations, search for the ones you want, tick them and click Add automation. The dashboard can then read their grid rows and their runs, and ask to start runs. An automation without a grid is marked no grid. Remove takes one off again.
- File areas
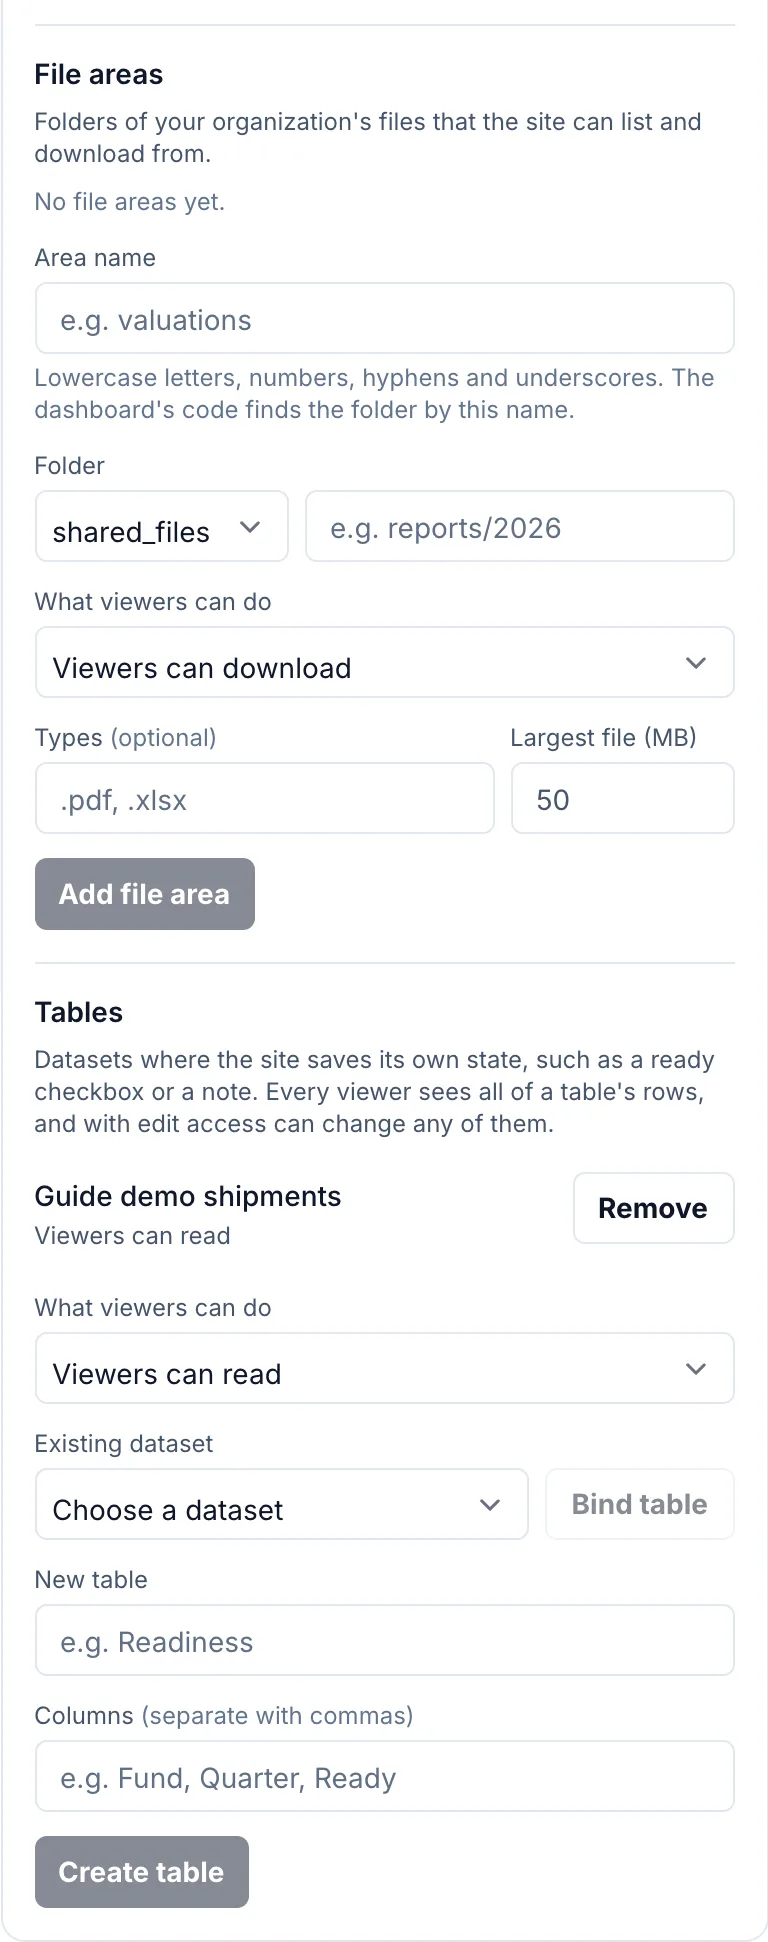
- Under File areas, click Add file area to add a folder of your organization's files. Type an Area name: the dashboard's code finds the folder by it. Under Folder, pick the top folder (
shared_filesormy_worklet_files) and type the folder inside it. Under What viewers can do, choose Viewers can download, Viewers can upload and download, or Viewers can upload, download and delete. If you like, list the file types under Types, and set Largest file (MB) (up to 50). Click Add file area in the dialog. - Tables
- Under Tables, click Add table to bind a dataset where the site keeps its own state, such as a ready checkbox or a note. First pick Viewers can read or Viewers can read and edit under What viewers can do. To use an existing dataset, pick it under Existing dataset and click Bind table. To make a new one, type a name under Or a new table and the column names under Columns, then click Create table.
Good to know
- Members of your organization always have full access to files and tables. A public visitor gets no files and can only read tables.
- An automation's grid cannot be bound as a table, because writing a grid row can start a run. Bind the automation instead.
- Every table is shared: everyone who can open the site sees every row of it, and with Viewers can read and edit every viewer and operator can change or delete any row.
4. Pages, landing page and brand
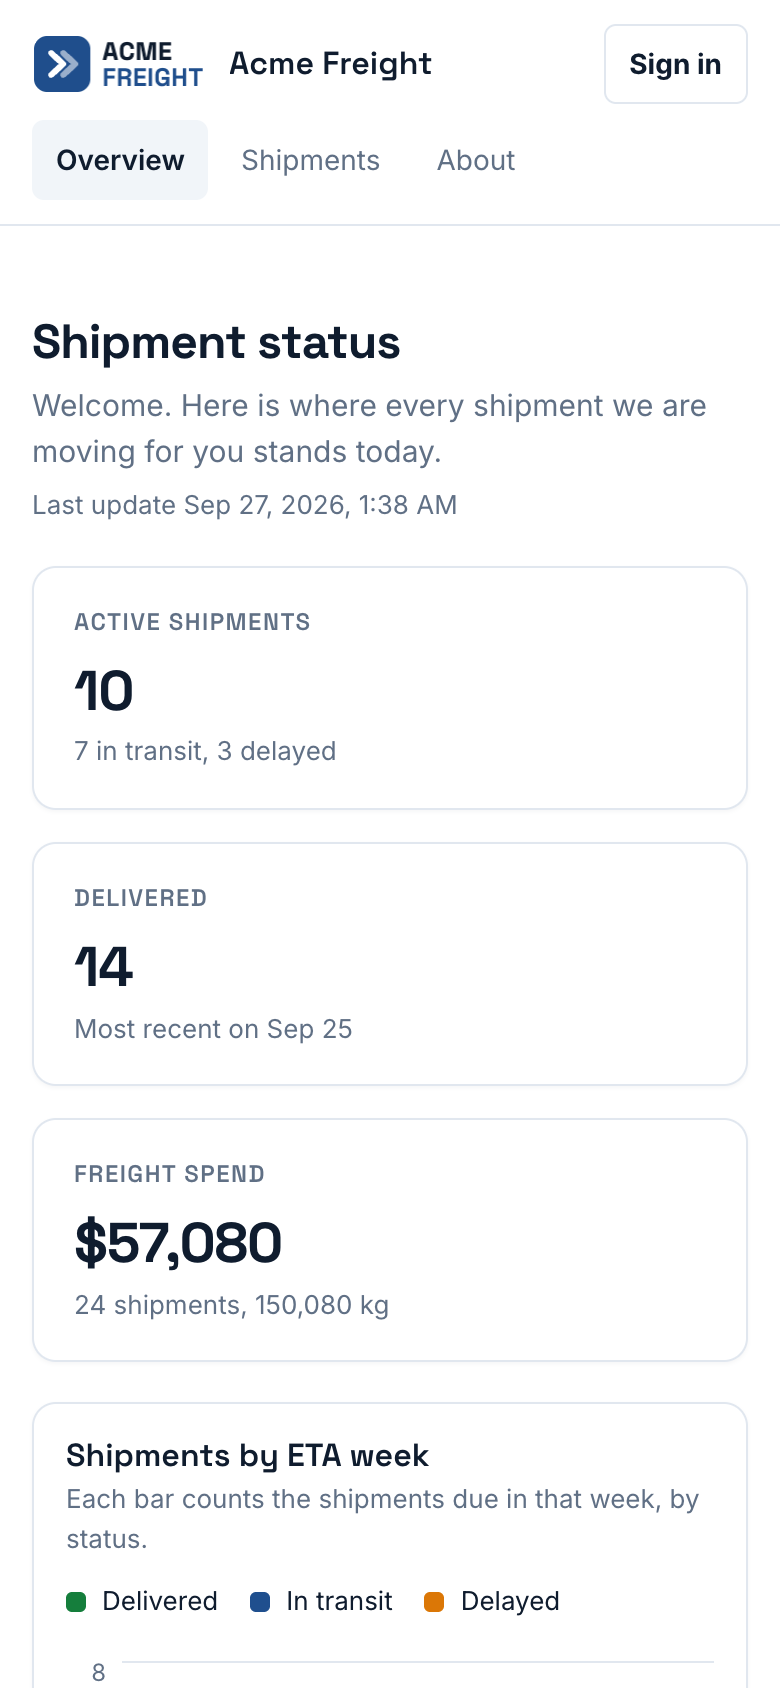
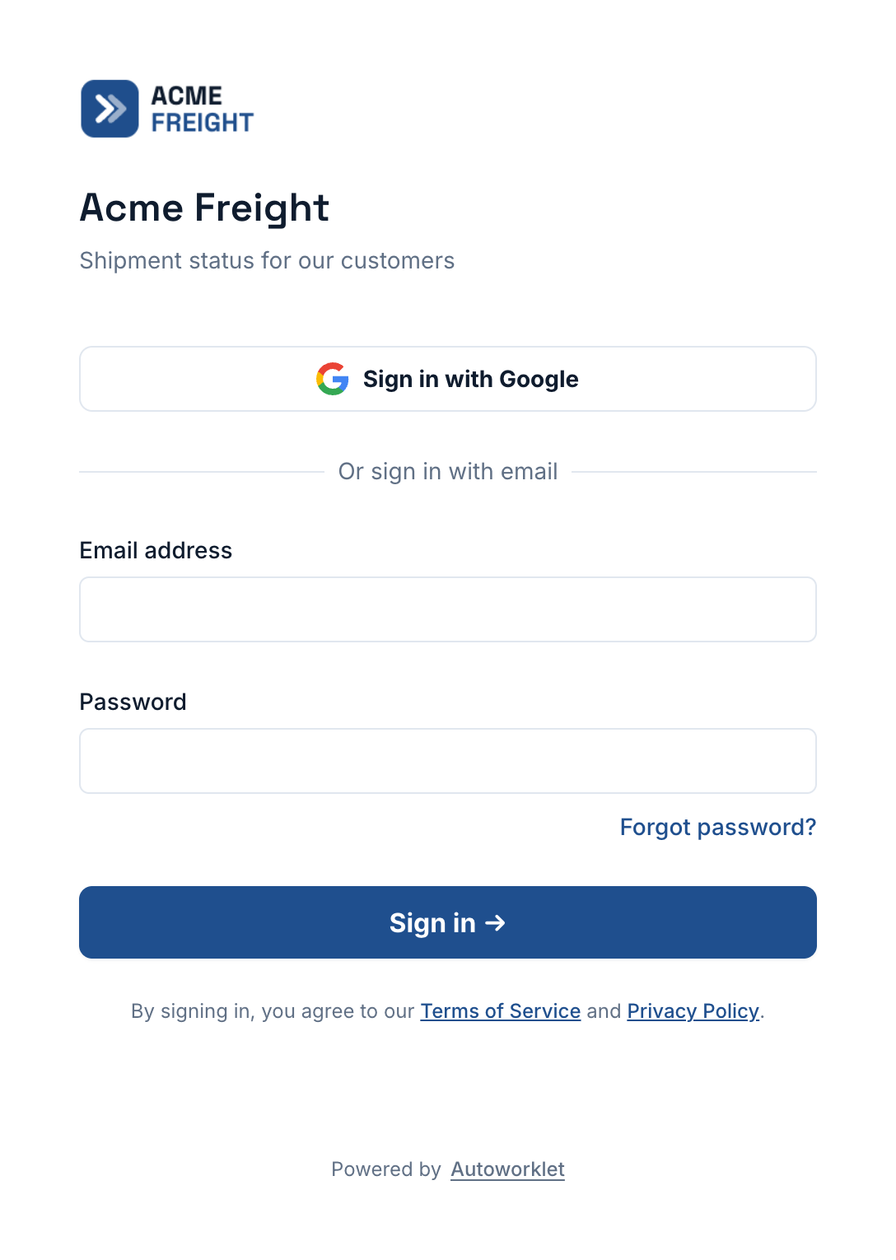
Ask the chat for the pages you want. The logo, colors and fonts are one brand for the whole site, including its sign-in page.
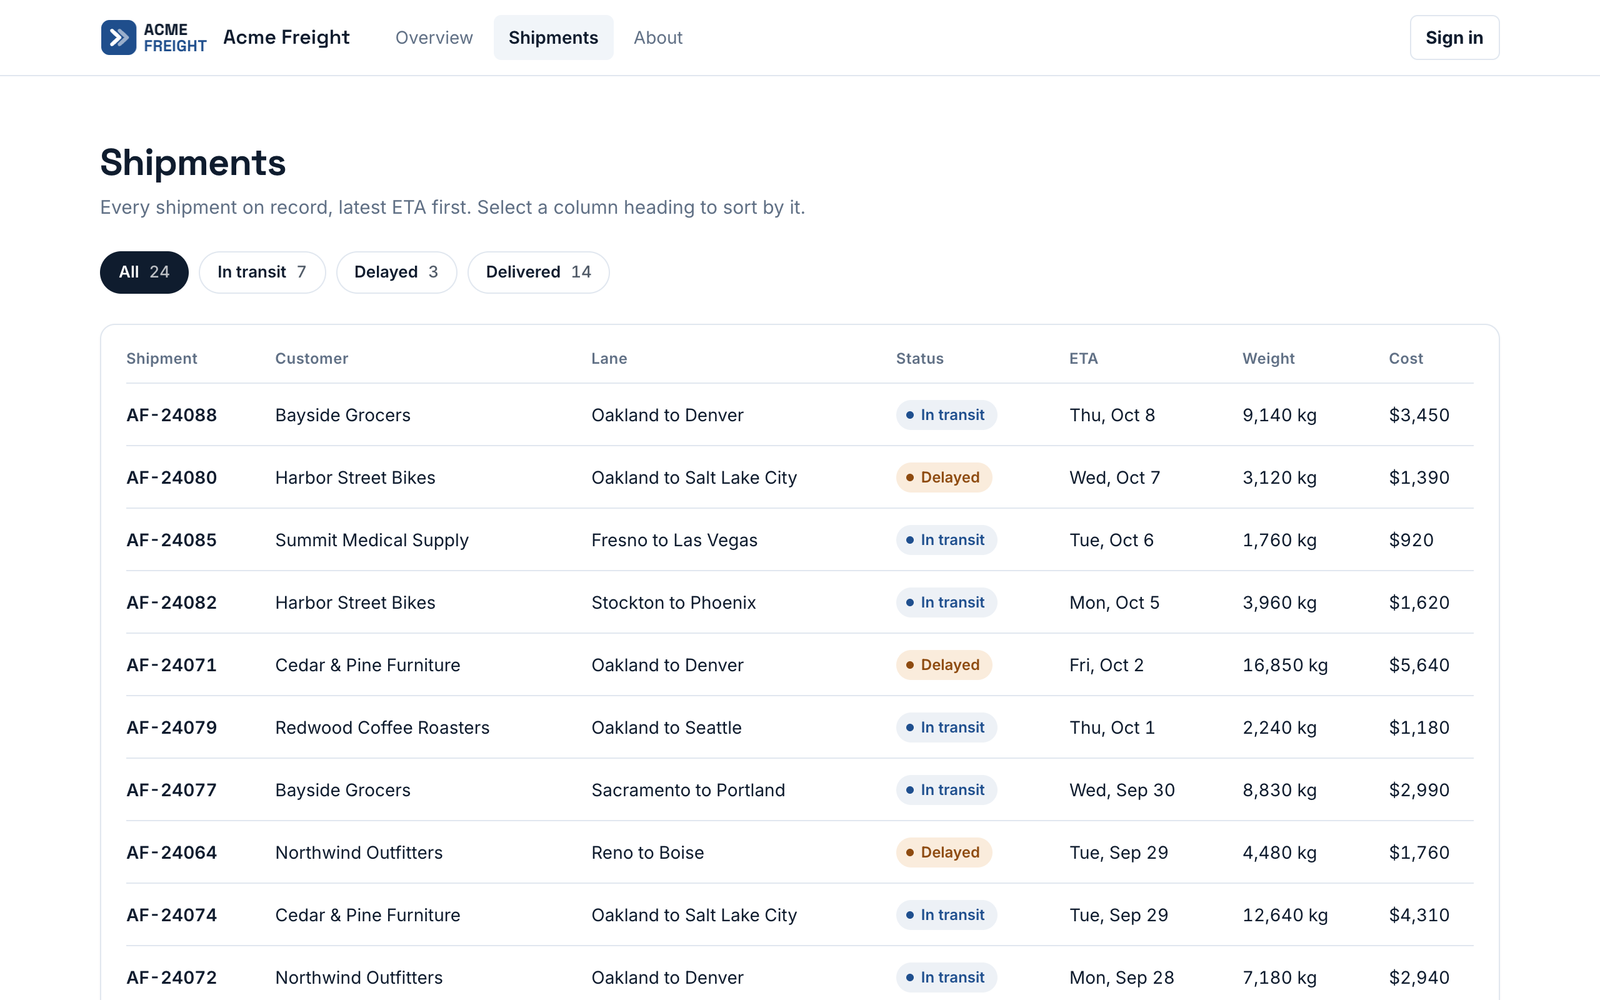
- Pages
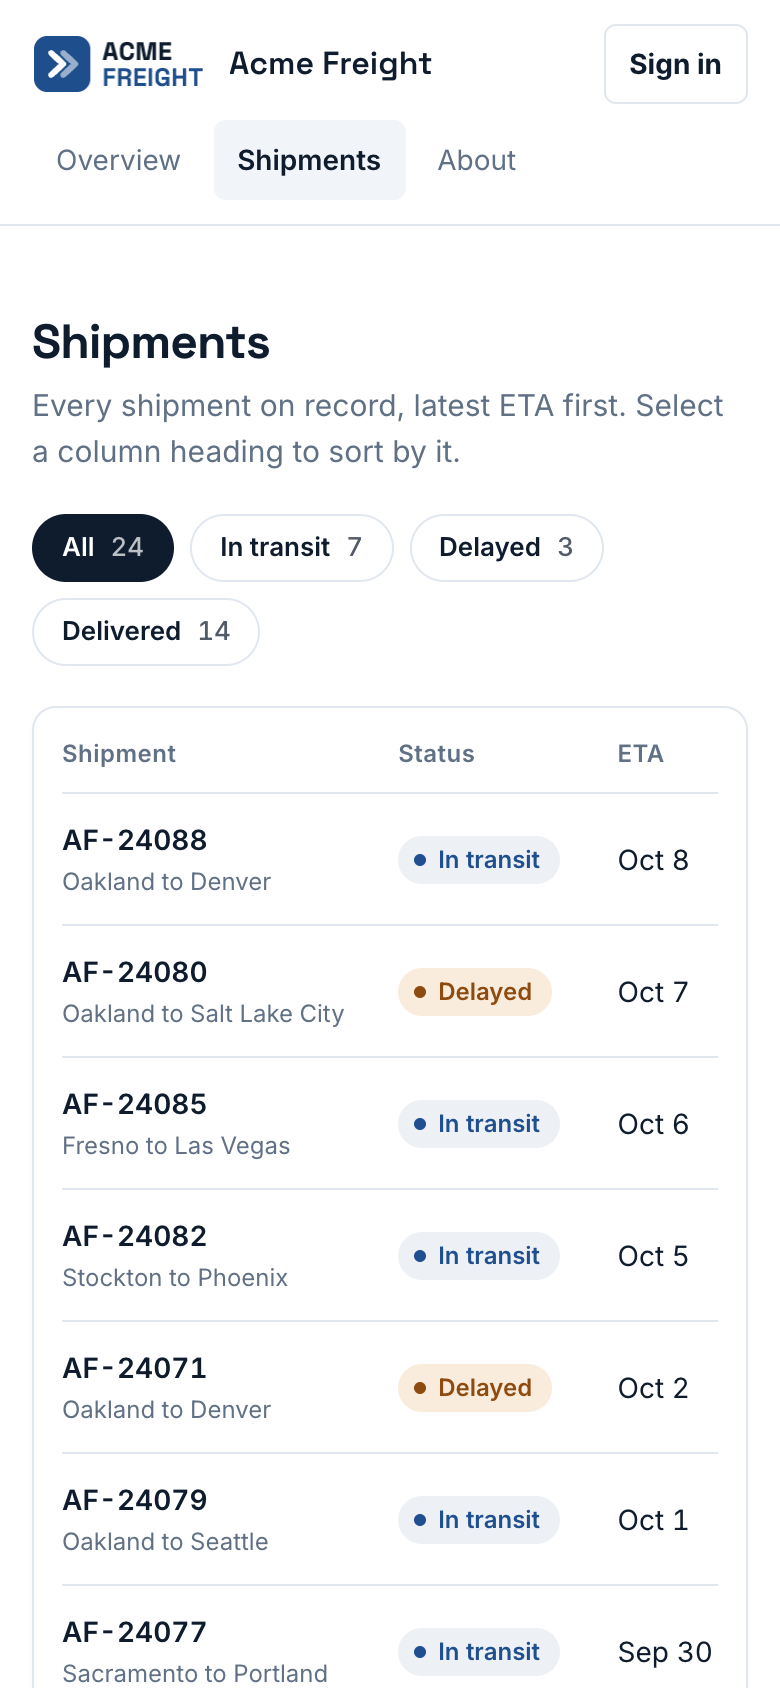
- Ask for a home page and the other pages, for example "an orders page". With two or more pages, the site header shows a link to each one. The page is part of the address, such as
#/shipments, so a link can open a page directly. - Landing page
- The address without a page opens the landing page. It is the first thing a client sees.
- Colors
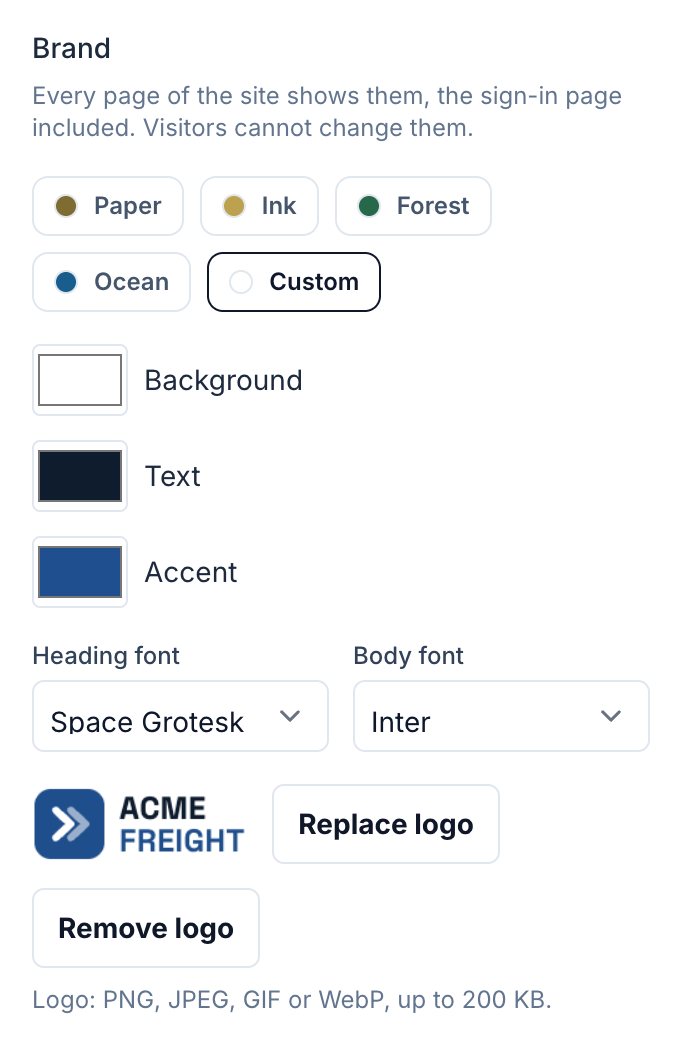
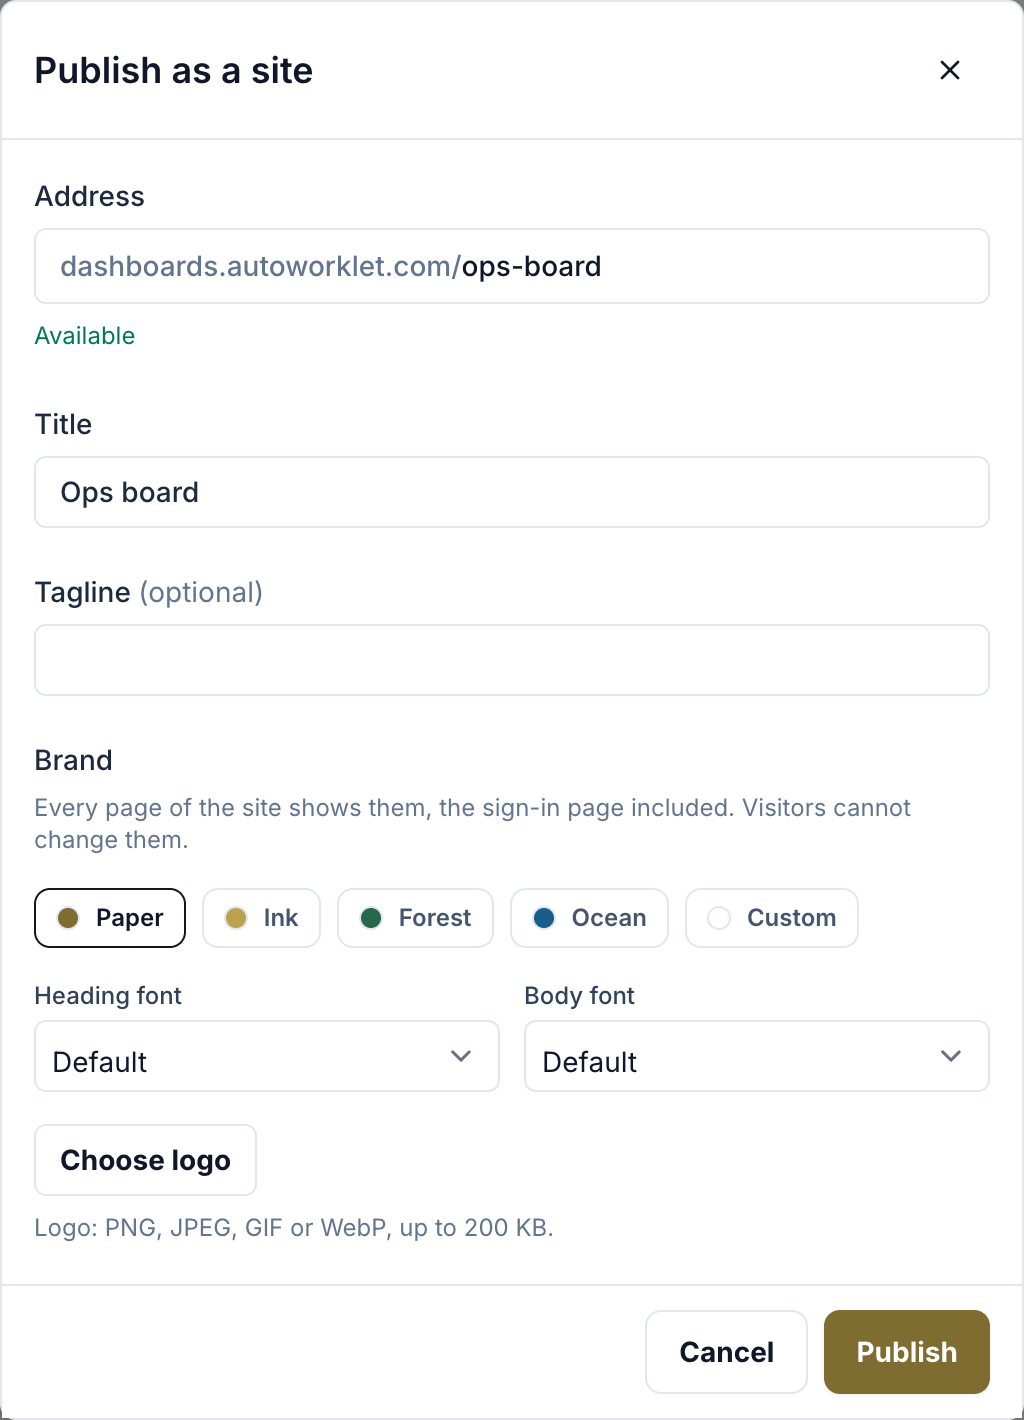
- Click Site settings (before the first publish, Publish). Under Brand, click Paper, Ink, Forest or Ocean. Or click Custom and pick your own Background, Text and Accent colors.
- Fonts
- Pick a Heading font and a Body font, or leave both on Default. The choices are Archivo, Newsreader, Inter, Source Serif 4, Space Grotesk and JetBrains Mono.
- Logo
- Click Choose logo (Replace logo once there is one) and pick a PNG, JPEG, GIF or WebP file up to 200 KB. Then click Save.
- Or ask the chat
- You can also ask the chat for colors, or attach a logo file to your message with the image button between the message box and the send button. The chat saves the brand at once, with no Accept step. It cannot make up a logo. It only uses a file you attach.
Good to know
- The brand is read live. Save in Site settings changes a published site at once, without Update site.
- A published site shows its title, tagline, colors, fonts and logo to anyone who opens its address, on the sign-in page too.
- Only admins and managers can change the brand. Invited people and public visitors see it and cannot change it.
5. Let people start runs
A dashboard can ask to start one run with inputs a person fills in, runs for pasted rows, or runs for every row that is waiting as ready. Rows past the automation's batch limit are added and wait as ready. A dashboard never starts a run by itself.
- A confirmation every time
- Autoworklet, not the dashboard code, shows a sheet that names the automation and lists the inputs, or the number of rows. It says This request came from the dashboard. Nothing starts until the person clicks the button that names the action, such as Start run or Run every ready row. Cancel drops the request.
- Who can start runs
- Any member can start runs from a dashboard in the app, and the run acts as that member. An invited operator can start runs only for the automations ticked under Operators may run in the Access panel. An invited viewer and a public visitor can never start a run.
- Minutes
- Every run uses your organization's execution minutes, like any other run, and appears in the automation's run history. That includes runs started by invited operators.
- A daily cap for operators
- Each invited operator can start up to 50 runs a day by default. Change it in Runs per operator per day, from 0 to 10,000. The count resets at midnight UTC. Past the cap the operator sees Daily run limit reached for this dashboard.
Good to know
- Uploads and deletes in a file area go through the same kind of sheet: Upload a file, or a Delete confirmation.
6. Edit the code yourself or with a coding agent
The chat is one way to change a dashboard. You can also edit its files in the Code tab, or let a coding agent such as Claude Code change them over MCP.
- What the code is
- A dashboard is a set of React files in TypeScript (
.tsxor.ts). The entry file ismain.tsx, and it mustexport defaulta React component. Files may import each other by relative path, plus onlyreact,rechartsand@autoworklet/dashboard. One version holds up to 100 files and 500 KB of source. - The Code tab
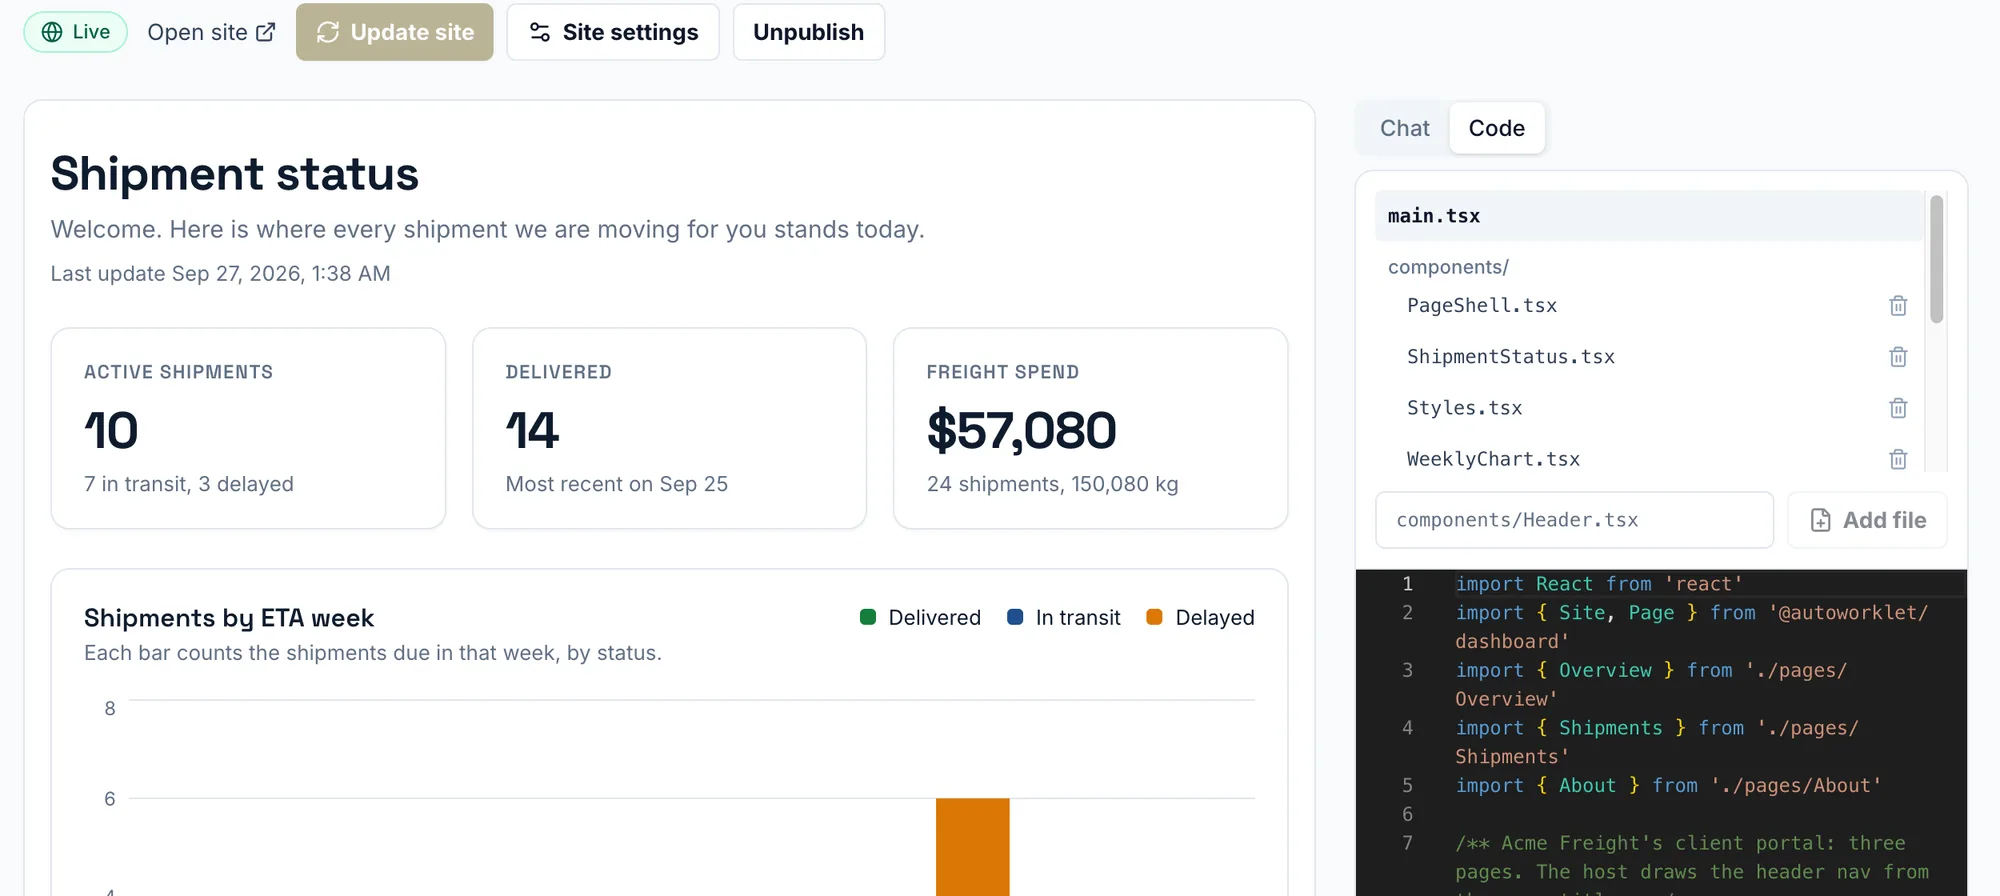
- Click the Code tab. Pick a file, or type a path such as
components/Header.tsxand click Add file. Edit, then click Preview. If the code does not compile, you see The code does not compile. with a link to each error. When the preview looks right, click Accept.
Build with a coding agent
- Open any automation, go to its Triggers tab, and in API Access click Create organization key. Copy the key. It is shown only once.
- Copy the command that API Access prints under the key. Right after you create the key, it has your organization id and the key filled in. For Claude Code it looks like this:
claude mcp add --transport http your_org \ https://api.autoworklet.com/v1/orgs/ORG_ID/mcp \ --header "x-api-key: YOUR_ORG_API_KEY" - Ask the agent to call
get_dashboard_apifirst, thenget_dashboard_source, change the files, and save them withsave_dashboard_draft. - Open the link from
get_dashboard_editor_url, check the preview, and click Publish or Update site.
Tool:
list_dashboards- Needs
read- What it does
- Every dashboard in the organization, with its access mode and, once published, its site address.
Tool:
get_dashboard- Needs
read- What it does
- One dashboard: its bindings, brand, access mode, site status and newest revisions.
Tool:
get_dashboard_api- Needs
read- What it does
- What dashboard code may import and call, and what the frame forbids. The agent reads it before it writes code.
Tool:
get_dashboard_source- Needs
read- What it does
- Every file of a revision. The draft by default.
Tool:
save_dashboard_draft- Needs
script- What it does
- Compiles all the files and saves them as the new draft. Clients see nothing until a person publishes.
Tool:
set_dashboard_bindings- Needs
script- What it does
- Sets which automations, file areas and tables the dashboard may use.
Tool:
set_dashboard_brand- Needs
script- What it does
- Sets the colors, logo and fonts.
Tool:
get_dashboard_editor_url- Needs
read- What it does
- The editor page where a person previews the draft and publishes it.
Good to know
- An agent saves drafts only. There is no publish tool, so a person always decides what clients see.
save_dashboard_drafttakes every file, not a diff, and saves the draft without an Accept step. A compile error comes back as file, line and column, and nothing is saved.- The key acts as the person who created it. Changes need that person to be an admin or manager of the organization.
- MCP works on every plan, Free included. Publishing still needs a Pro or Enterprise plan.
7. Publish as a site
Publishing gives the dashboard its own address. Clients see the version you published until you send them a newer one.
Publish
- Accept at least one version. Until then Publish is off.
- Click Publish. The dialog is titled Publish as a site.
- Check the Address. It starts from the dashboard name, and the dialog says Available when the address is free.
- Fill in Title and, if you want one, Tagline.
- Click Publish. The status reads Live, and Open site opens it in a new tab. If the site is set to Anyone with the link, the button reads Publish publicly.
Option: Members only
- Who can open the site
- People in your organization, after they sign in.
- Who can start runs
- Members, as themselves.
Option: Invited viewers
- Who can open the site
- Members, and the people you invite from the Access panel.
- Who can start runs
- Members, and operators for the automations ticked under Operators may run.
Option: Anyone with the link
- Who can open the site
- Anyone. No sign-in needed.
- Who can start runs
- Members, and operators who sign in, for the ticked automations. A public visitor never can.
- Address rules
- An address is 3 to 40 characters of lowercase letters, numbers and single hyphens. Addresses are shared by every organization, so one that is taken is refused. Some words are reserved, such as
login,accountandadmin, and so is any address that containsautoworklet. - Send changes to clients
- After you accept a new version, the status reads Live, draft has changes. Click Update site. The confirmation names the revision clients see now and the one they will see, and Update site there publishes it.
- What changes at once
- Publishing freezes the code. The brand, bindings, file areas, tables and access settings are read live, so saving any of them changes the published site at once. Removing an automation, a file area or a table asks you to confirm first, because it also clears that item's settings in Access.
- Go back to an earlier version
- The Revisions panel lists every accepted version, newest first, and marks the Draft and the one Live on the site. Click Restore to make one the draft, then Update site to send it to clients.
- Change the address, title, tagline or brand
- Click Site settings, change the Address, Title, Tagline or Brand, and click Save. If you change the address, the old one stops working, so links you already sent will not open.
- Take it down
- Click Unpublish and confirm. Clients cannot open the site until you publish again. The address stays yours, and invitations are kept.
- Delete a dashboard
- Click Delete in the editor header and confirm. This removes the dashboard, every revision, everyone invited to it and their invites, and frees the address. Your automations and their rows are not touched.
Good to know
- Only admins and managers can publish, update, change site settings or unpublish. Each of these needs a Pro or Enterprise plan, whoever the site is for. On Free and Starter the editor says Shared dashboards need the Pro plan or above.
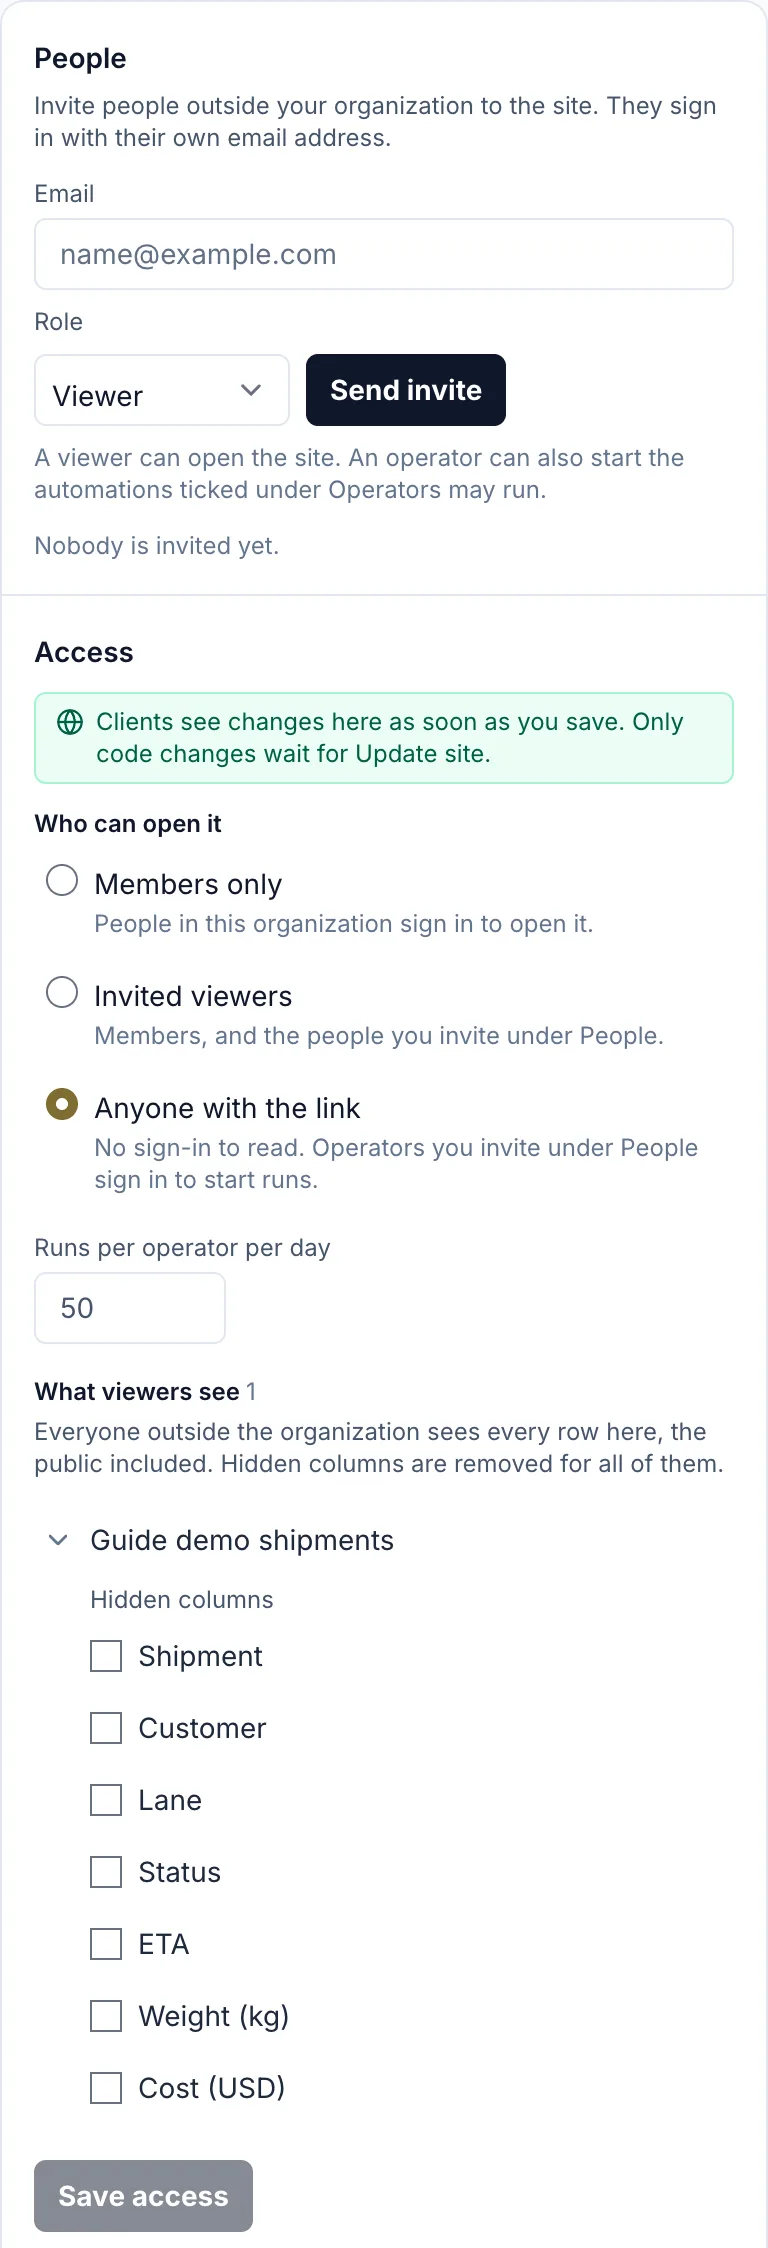
- Who can open it is set only in the Access panel, before or after you publish. Pick Members only, Invited viewers or Anyone with the link, and click Save access. Before the first publish it applies once the site is live.
8. Invite clients
With Invited viewers, only your members and the people you invite can open the site. With Anyone with the link, anyone can read it, and the operators you invite sign in to start runs. Each person signs in with their own email address.
Invite a client
- Publish the site first. The invite opens it.
- If the site is set to Members only, choose Invited viewers or Anyone with the link under Who can open it in the Access panel, and click Save access.
- Under People at the top of the Access panel, type the client's address under Email, pick a Role, Viewer or Operator, and click Send invite.
- The client gets an email. If it does not arrive, send them the link shown after Invite link, if the email does not arrive:
- For an operator, tick the automations they may start under Operators may run, and click Save access.
- Viewers and operators
- A viewer can open the site. An operator can also start the automations ticked under Operators may run. To change what someone may do, pick the other role in the menu next to their email. It applies on their next page load or run, and no new email is sent.
- Hidden columns
- Everyone outside your organization sees the same rows. Under What viewers see, click an automation or a table to show its columns, and tick a column under Hidden columns to remove it for all of them, from the rows and from run outputs. Members still see it. A long list has a Filter by name box.
- What the client does
- They open the invite link. A new email gets Set a password: they choose a password, agree to the terms, and click Set password and open followed by the site title. An email that already has an account gets Sign in to accept. Then the site opens. The invite link proves the email address, so no separate verification email is sent.
- Signing in later
- Clients sign in at
dashboards.autoworklet.com/<site>/login, with Sign in with Google or with email and password. Forgot password? leads to Send me a link, which emails a reset link only to people the site is shared with. On/<site>/accountthey can change their password or Sign out everywhere.
- No workspace for clients
- An account created from a site invite has no Autoworklet workspace of its own. If the client signs in to the main app, they see Sites shared with you, and a Create a workspace button if they want one.
- Remove a client
- Click Revoke next to their email. They lose access on their next request, and open invites for that email are withdrawn.
- A public link instead
- Under Who can open it in the Access panel, choose Anyone with the link, read the note on what a public visitor can see, and click Save and make public. Then click Copy link in the Access panel. Anyone with the link can read the site. Only the operators you invite can start runs, after they sign in.
Good to know
- An invite link works for 7 days. Inviting the same email again withdraws the earlier invite.
- Clients are signed out after 2 hours without activity, and after 24 hours in any case.
- A client who has several sites sees them all at
dashboards.autoworklet.com, under Sites shared with you.
9. What the dashboard can and cannot do
The dashboard code runs in a sealed frame inside the page. It gets its data from Autoworklet only, and only what you bound.
It can
- Read the rows and runs of the bound automations, and the rows of the bound tables.
- Show pages, charts, tables, filters, inputs and buttons.
- Ask to start a run, or to upload, download or delete a file. A person confirms each run, upload and delete.
- Save a row in a bound table, when the person may edit it.
- Show the logo you saved.
It cannot
- Make network requests or load pictures from the web.
- Submit an HTML form. The chat uses inputs and buttons instead.
- Leave the page. If the code tries to open another address, Autoworklet closes the frame and says This dashboard tried to leave the page, so it was closed.
- Start a run or change a file without a person confirming.
- Read anything that is not bound. The server refuses it.
- Change the site header or the sign-in page. Autoworklet draws those.
10. Plans and limits
Building and using dashboards inside your organization works on every plan. Publishing a site needs a Pro or Enterprise plan.
| What | Limit |
|---|---|
| Build and use dashboards in the app | Every plan: Free, Starter, Pro and Enterprise |
| Publish a site, invite people, share a public link | Pro and Enterprise |
| Edit with a coding agent over MCP | Every plan |
| One version of the code | 100 files and 500 KB of source |
| Code the chat sends to the model | 200 KB |
| Logo | PNG, JPEG, GIF or WebP, up to 200 KB |
| Largest file in a file area | 50 MB |
| Runs per operator per day | 50 by default, 0 to 10,000 |
| Invite link | 7 days |
| Site address | 3 to 40 characters |
| Client session | 2 hours idle, 24 hours at most |
Good to know
- If your organization moves below Pro, invited people and public visitors are refused on their next visit. A Members only site stays open to members.
- Publish, Update site, Site settings and Unpublish are then refused until you upgrade, so the only way to take the site down is to delete the dashboard. Bindings, Members only access and a brand saved from the chat still apply to the live site. To match the site to what the plan allows, choose Members only under Who can open it in the Access panel, and click Save access.
Build your first dashboard
A dashboard reads the automations you teach. Start free, teach one automation, then open Menu, open the Dashboards group, and click Dashboards.
Already have an organization? Sign in.